How to Convert a Golf Cart to Lithium: The Order I’d Do It, and the Mistakes I See Most
CartVoltage is reader-supported. If you buy through links on this page we may earn a commission at no extra cost to you. As an Amazon Associate we earn from qualifying purchases. Details
I design lithium battery packs for a living, and I’ll tell you the thing that surprised me most when I started reading golf cart forums: almost nobody has trouble with the battery. The pack goes in, the pack works. Where people lose a Saturday is everything around it. The charger plug that doesn’t fit. The main cable that’s four inches too short. The Club Car that won’t charge because a little black box under the seat is still doing its old job. The cart that’s “dead” because a switch is in the wrong position. This guide is the conversion I’d do if it were my cart, in the order I’d do it, with the mistakes I’ve watched other people make so you don’t have to make them yourself.
It applies to any 36V or 48V lead-acid cart. Where a specific brand does something odd, I’ll point you to the page that covers it: EZGO TXT, EZGO RXV, Club Car DS and Precedent, Onward and Tempo, Yamaha, ICON, Evolution.
Before You Buy Anything: Three Things to Write Down
Go out to the cart with your phone and a tape measure. Ten minutes now saves a return shipment later.
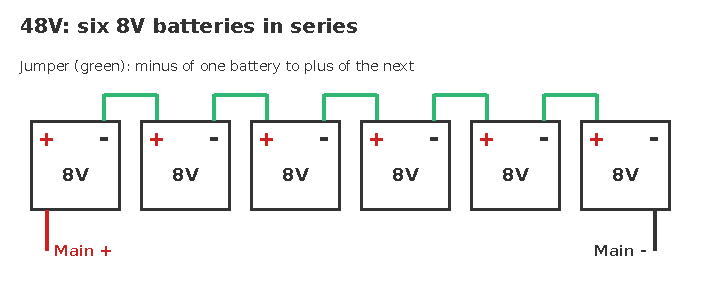
- Count the batteries and read one label. Six 6V is a 36V cart. Six 8V or four 12V is 48V. That’s your pack voltage, and there’s no flexibility in it. A 48V pack in a 36V cart needs a new controller and motor; that’s a different project.
- Photograph the charger receptacle on the cart body, close up, in good light. EZGO TXT, EZGO RXV, Club Car and Yamaha all use different plugs, and two of the EZGO plugs look identical until you try to mate them. You’ll match this photo to the seller’s plug chart, or to the drawings in golf cart charger plug types, identified by shape.
- Measure the tray: inside length, inside width, and the height from the tray floor to the lowest point of the seat frame. Write all three on the photo. Most 100 to 105Ah packs are about 20 by 12.5 by 9.5 inches and fit anything; 150Ah packs are taller and this is where older Yamahas bite.
While you’re there, lift the seat and look for a small black box with thin wires running to the batteries. On a 1995 to 2013 Club Car that’s the On-Board Computer, and it matters later. On anything else, note anything wired to a single battery rather than to the pack ends; that’s a 12V accessory tap and it’s about to lose its supply.
Choosing the Pack: The Two Numbers I Actually Look At
Listings lead with amp-hours and cycle counts. I look at two other things first.
Continuous discharge current of the BMS. This is the one spec that decides whether the pack keeps up with your cart on a hill. The controller in a stock cart asks for 250 to 300A when you floor it from a stop; a lifted cart with big tires can hold that for the length of a climb. A BMS rated 200A continuous with a 1000A burst handles the first case fine, because the burst window covers a few seconds. It does not handle the second, and the cart will lurch when the BMS opens. For a stock cart on ordinary terrain, 200A is enough. For lifted, six-seat or hilly, I’d want 250A and I’d pay for it before I paid for extra amp-hours.
What’s actually in the box. A kit that includes a charger with your cart’s plug, cables long enough to reach, and a bracket saves you three separate purchases and a week of waiting. The conversion kit comparison lists nine kits by exactly this. If you’d rather choose the pack on its own merits, the 48V and 36V comparisons are spec-by-spec. And run your cart through the range calculator before you decide between 105 and 150Ah; the listing’s “up to 50 miles” is a light cart on flat pavement, and you probably don’t have one of those.
The Shopping List
| Item | Do you need it? | Notes |
|---|---|---|
| Lithium pack (36V or 48V, 100 to 150Ah) | Yes | The Vatrer 48V 105Ah is the one I’d point a first-timer to for its UL listing; the DC HOUSE kit for a one-box purchase |
| Lithium charger with your plug | Yes, unless the kit includes it | Your lead-acid charger will not work. Plug table here |
| 36V or 48V to 12V reducer | If the cart has lights, horn, stereo or USB | Pro Chaser 30A; why you need it |
| Hold-down bracket, strap or spacers | Yes | The single most-forgotten item. A single pack in a six-battery tray will walk |
| Main cables, 2 or 4 gauge, with ring terminals | Often | Factory leads were cut for a different geometry. Have a spare pair on hand |
| Lithium state-of-charge meter | If the pack has no app or display | Lithium meter; the factory gauge will read wrong. Meter options for lithium |
| Baking soda, wire brush, gloves, safety glasses | Yes | Lead-acid trays are acidic. Neutralise before you touch bare metal |
| Inline fuse holder and 10A fuse | If fitting a reducer | For the reducer’s input. Never wire it unfused |
The Conversion, in the Order I’d Do It
Budget two hours for the first one. Have a helper for the lifting; each lead-acid battery is 55 to 70 lb and there are four to eight of them. Where they go afterwards, and what they are worth: how to dispose of old golf cart batteries.
1. Run/Tow switch to TOW. Key off, key out.
It’s under the seat on almost every cart built since the late 1990s. TOW disconnects the controller so nothing sparks or gets damaged while you’re moving cables around. I mention it first because “cart is dead after conversion” is, more often than any other cause, this switch still in TOW at the end of the day. On carts with an electromagnetic brake (RXV, ICON, Evolution), TOW also releases the brake, so chock a wheel.
2. Photograph everything, then photograph it again.
Both main leads where they leave the pack. Every thin wire that touches a battery terminal. The charger receptacle wiring. If there’s an OBC, its harness. You will not remember which small red wire went where. Your phone will.
3. Main negative off first. Then main positive. Tape both ends.
Negative first means that if your wrench touches the frame while you’re on the positive terminal, there’s no circuit to complete. This is the habit that protects controllers. Tape the cable ends so they can’t fall onto a terminal while you work.
4. Remove the jumpers, lift out the batteries.
Keep the jumper cables that look healthy; the main leads are sometimes reusable. Set the old batteries on cardboard, not concrete, if you’re taking them back for a core credit. Most retailers pay one.
5. Clean the tray properly. This is the only time you’ll see it.
Baking soda and water paste on any white or green residue, let it fizz, rinse, dry. Wire-brush the rust. If the tray is pitted, a coat of rust converter now is worth an hour. A lithium pack doesn’t leak, so whatever state you leave the tray in is the state it stays in for ten years.
6. Club Car with an OBC? Do the bypass now, while the bay is empty.
The On-Board Computer sits in the charger’s negative path and expects lead-acid. With lithium it usually stops the charger running at all. The fix is to route the charger receptacle’s negative wire straight to the pack negative and disconnect the OBC’s gray sense wire. Fifteen minutes with a crimper; the full wiring is in the Club Car guide. Every other brand skips this step.
7. Set the pack. Then secure it before you connect anything.
Terminals toward where the main leads reach. Fill the empty tray space with the pack’s foam spacers, a bolted block, or the factory hold-down bar with spacers under it. Then strap or bracket it. I put this before the wiring because once the cables are on, people stop thinking about the pack sliding, and a 90 lb box that moves under braking will tear a cable off a terminal. A lithium pack leaves a third of the tray empty: see the footprints. Bracket and strap options by cart: lithium golf cart battery hold-down brackets.
8. Main positive on, then main negative on. Torque them.
Reverse of removal. The pack’s manual gives a torque figure for its terminals, usually 8 to 10 ft-lb for M8 studs; use it rather than “tight.” Too loose and the terminal heats under load; too tight and you crack the stud out of the case. If a factory lead doesn’t reach cleanly, don’t stretch it onto the edge of the stud. Fit a longer cable. On a cart whose controller has big capacitors, touch the last cable to the terminal through a resistor or a pre-charge lead for a few seconds before bolting it down; skip this and the BMS latches its short-circuit protection: how to reset a tripped BMS.
9. Charger receptacle leads to the pack. Reducer if fitted.
Receptacle positive to pack positive, receptacle negative to pack negative (direct, not via an OBC). Reducer: fused input across the pack terminals, output to wherever the old 12V tap went. Wire the reducer through the key switch if you can; it stops it drawing from the pack while the cart sits. Running two packs? The parallel wiring guide adds a fuse per pack and the matching step. Cable gauges and fuse sizes for every run: lithium golf cart wiring basics.
10. Wake the pack. Run/Tow to RUN. Key on.
Many packs ship in a sleep state; press the button, use the app, or connect the charger for a minute. Then RUN, key on, and the cart should come alive. If it doesn’t, don’t start pulling things apart. Go through the won’t-move checklist; nine times out of ten it’s the switch, the sleep mode, or a lead on the wrong terminal.
11. Test drive slowly. Then plug in the charger and watch it start.
Ten minutes around the block, listen for anything that shifts under braking, then charge. A charger that starts and stays running is your sign the receptacle wiring and the profile are right. One that clicks on and off, or never starts, is the won’t-charge checklist, and the answer is usually the plug, the profile, or the OBC; what its lights mean is in charger blinking red or green, explained. Still hoping to keep the old charger? Read this first.
The Things I See Go Wrong, in Order of How Often
- Run/Tow left in TOW. Everyone does it once.
- Wrong charger plug. Especially EZGO TXT48 versus RXV. Match by photo, not by name.
- Old lead-acid charger kept. It either won’t start or overshoots and trips the BMS.
- Club Car OBC not bypassed. Charger runs for three seconds and stops.
- Lights dead. The 12V tap went with the lead-acid pack. Reducer.
- Pack not secured. Discovered the first time someone brakes hard.
- Cart cuts out on hills. BMS continuous rating below what the controller draws. This one is a buying mistake, not an install mistake, and it’s why I put the BMS number first.
- Dash gauge “wrong.” It isn’t wrong; it’s calibrated for lead-acid. Use the app or a lithium meter: why the factory meter reads wrong on lithium.
- Cart dead after sitting a month. On RXV and ICON, the parked draw reached BMS cutoff. Wake it, charge it, use TOW for storage.
The First Week
Charge after use rather than before. Check the main terminals once after a few drives; a pack vibrates differently from six batteries and a bolt that felt tight can loosen. Set a charge limit of 90% in the app if the pack allows it, and go to 100% only before a long day; the cells last longer that way. And take the old batteries back for the core credit before they become garage furniture.
What It Costs and What You Get
A realistic 48V conversion with a 100 to 105Ah pack, charger, reducer and hardware lands between $850 and $1,900, most owners around $1,100 to $1,300. In return the cart loses 250 to 300 lb, holds its speed on hills instead of fading, charges in four to six hours, and needs no watering, no terminal cleaning and no equalising. The pack should outlast two lead-acid sets. The cost calculator does the ten-year math with your own prices; the honest summary is that lithium costs less per year for anyone keeping the cart more than four years, and doesn’t for anyone selling it next spring.
Frequently Asked Questions
How hard is it to convert a golf cart to lithium?
Two hours with hand tools for most carts, and the electrical part is simpler than the lead-acid setup it replaces: two main cables instead of a dozen jumpers. The awkward parts are lifting the old batteries and, on Club Car, the OBC bypass.
Do I need to change the controller or motor?
Not if you stay at the cart’s original voltage. The controller sees 48V (or 36V) and doesn’t care where it comes from. Changing voltage, 36V to 48V, is a controller and motor project on top of the battery. Which stock parts stay and which get replaced: controller, solenoid and OBC on a lithium conversion.
Can I keep my old charger?
Almost never. Lead-acid chargers use the wrong voltage profile. A few smart chargers have a lithium mode; check the manual. Most kits include a lithium charger, and it needs your cart’s plug.
What size lithium battery do I need?
100 to 105Ah for a stock two to four-seat cart doing under 15 miles a day. 150Ah for lifted carts, six-seaters and long days. The range calculator gives a number for your cart and terrain.
Is it safe to do myself?
Yes, with the habits above: TOW mode, negative off first and on last, tools kept off the terminals, a fuse on any reducer. A 48V pack can deliver hundreds of amps into a dropped wrench; respect it and it’s a straightforward afternoon. If the cart is a factory-lithium model with a CAN-linked pack (EZGO ELiTE, some ICON and Evolution), read that cart’s guide first, because a plain drop-in won’t work.
Next Steps
Confirm voltage, plug and tray in the fitment guide, pick a pack or kit from the comparisons above, and follow your cart’s own page for the brand-specific steps. If you’re still deciding whether to do it at all, Is a Lithium Conversion Worth It? is where I’d start.